Because photo organisation is a big part of Adobe Lightroom Classic it has few clever optimisation tricks up its sleeve. These come mainly in the form of Previews. When viewing, culling, or organising photos Lightroom Classic doesn’t need to open a heavy DNG file. These are all tasks that need to be fast and efficient. So what does Lightroom Classic do to make this task bearable? It uses Previews.
Lightroom Classic Previews seemed a bit alien to me when I started out, so I’m writing this article for anyone in a similar situation. Let’s talk about Previews and why they might be your best friends when working in Lightroom.
The four Lightroom Classic Previews
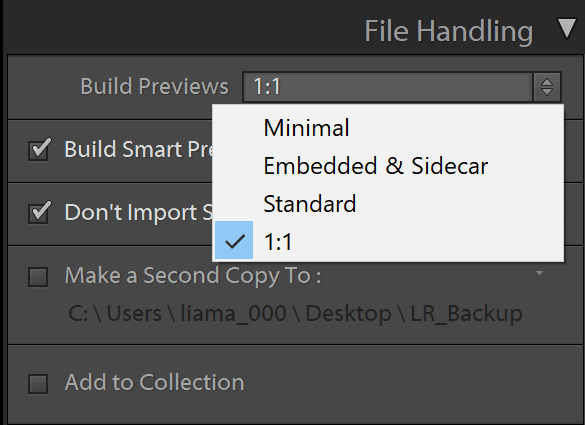
When importing files from an SD card Lightroom will let you select from four different types of previews. You can either go for Minimal, Embedded & Sidecar, Standard, or 1:1.
Embedded previews
Broadly speaking we can group the Minimal and Embedded & Sidecar Previews together. For simplicity’s sake, we’re going to call them the embedded previews. Both are not generated by Lightroom Classic but by your camera. A raw file coming straight out of your camera will have one or multiple JPEG images embedded.
Minimal Previews
A Minimal Preview will immediately display the images you’re importing using the smallest Preview embedded in the raw file. This is the fastest option of getting your images into Lightroom and ready for culling. But obviously the file you’ll be looking at won’t be of the highest quality.
Embedded & Sidecar Previews
An Embedded & Sidecar Preview will display the largest possible Preview available from the raw file. Importing these will take longer than the Minimal preview because, as expected, the files are larger. But it is still faster than having Lightroom render its own previews.
When to use Embedded previews
Using the Embedded Previews does have a speed advantage because the Preview doesn’t have to be rendered. It just gets extracted and copied.
This makes the Embedded Previews a great option for culling large amounts of photos. Say you just came back from a trip and have multiple SD cards with hundreds or even thousands of photos. Generating previews inside Lightroom Classic would take an eternity. Instead of waiting for Lightroom to do it’s thing you can select one of the embedded preview options and start the process of culling a lot quicker.
After you’re done culling many photos will have been removed from your library. You can then let Lightroom Classic build its own Previews and because the number of photos is smaller, it will be a quicker process.
But there’s one major downside to using Embedded Previews. They aren’t colour managed. Embedded Previews don’t match how Lightroom Classic interprets the raw files.

So colours might look different to the way Lightroom Classic interprets them. But don’t fret, Lightroom Classic has yet another trick up its sleeve. You can enable the setting to replace Embedded Previews with Standard Previews during idle time. That way Lightroom Classic will automatically start building Previews while it isn’t using too many system resources.
The automatic rendering is set to prioritise the folder you’re currently working in. So you won’t have to wait because Lightroom Classic started working on random two year old files. Lightroom Classic will start it’s work in the same location as you. Basically you’re making Lightroom Classic work a bit every time you go for a cuppa. Alternatively you can also manually build the previews.
Lightroom Classic previews
Next we have the previews which are generated by Lightroom Classic itself. These come in two flavours: Standard and 1:1.
Standard previews
Standard Previews are what you see in the Fit zoom level of the Loupe view. You can specify the size of these previews in the Catalog Settings. However, just because you can doesn’t mean you should. Lightroom Classic will automatically adjust these based on your screen size. But it might be worth having a look if you use multiple monitors.
1:1 Previews
1:1 Previews will deliver the highest quality. As the name suggests it will be the identical size, in terms of pixels, to your imported raw file. These Previews have the advantage of not delaying when zooming into a photo. But with big files come big file sizes. By default, Lightroom Classic will have these 1:1 Preview files deleted after 30 days. You can obviously also change that in the settings.
How I use Lightroom Classic Previews
I’ll use Previews differently depending on how many photos I’m importing. If I’m back from a longer trip with hundreds of photos I will use one of the Embedded Previews just for culling. I generally don’t go for the Minimal though because I feel like the bad quality could influence my decision on whether a photograph is a keeper or not.
Once culled I’ll trigger the Standard Previews. That way I’m 100% sure that Lightroom Classic will start building them.
If I’ve been on only a short trip I will build standard previews right from the get-go. By the time I’m unpacked, showered, and fed those will have been built.