One thing I love about GeneratePress is its customisability and how easy it makes it to design a unique website. It’s one of the reasons I believe that GeneratePress can be used for any type of content. I use it for this website and two similar ones, a recipe blog, my personal website, and my photography portfolio.
Page heroes have become increasingly more popular as the general population’s internet speed and especially mobile connectivity has gone up. I love using page heroes on my recipe blog because it allows me to use a photo of the finished meal. It’s the first thing a visitor sees and hopefully entices them to read on.
Creating custom fields using Advanced Custom Fields (ACF)
Advanced Custom Fields (ACF) makes it easy to create any custom field. And so far, I have had no reason to upgrade to the paid version. Everything you’re seeing here has been done using only the free plugin.

I’ve set this set of custom fields to appear whenever a post is categorized as Food. As the website is in the German language, these fields are also in German but what it boils down to is that I have three fields: Two are file uploads, for PDF versions of the recipe, and one is a single line of text, for the subtitle. You will see the Name of each of these custom fields appear in the GeneratePress Element’s code later on. You can embed each custom field using the shortcode [acf field="NAME"].
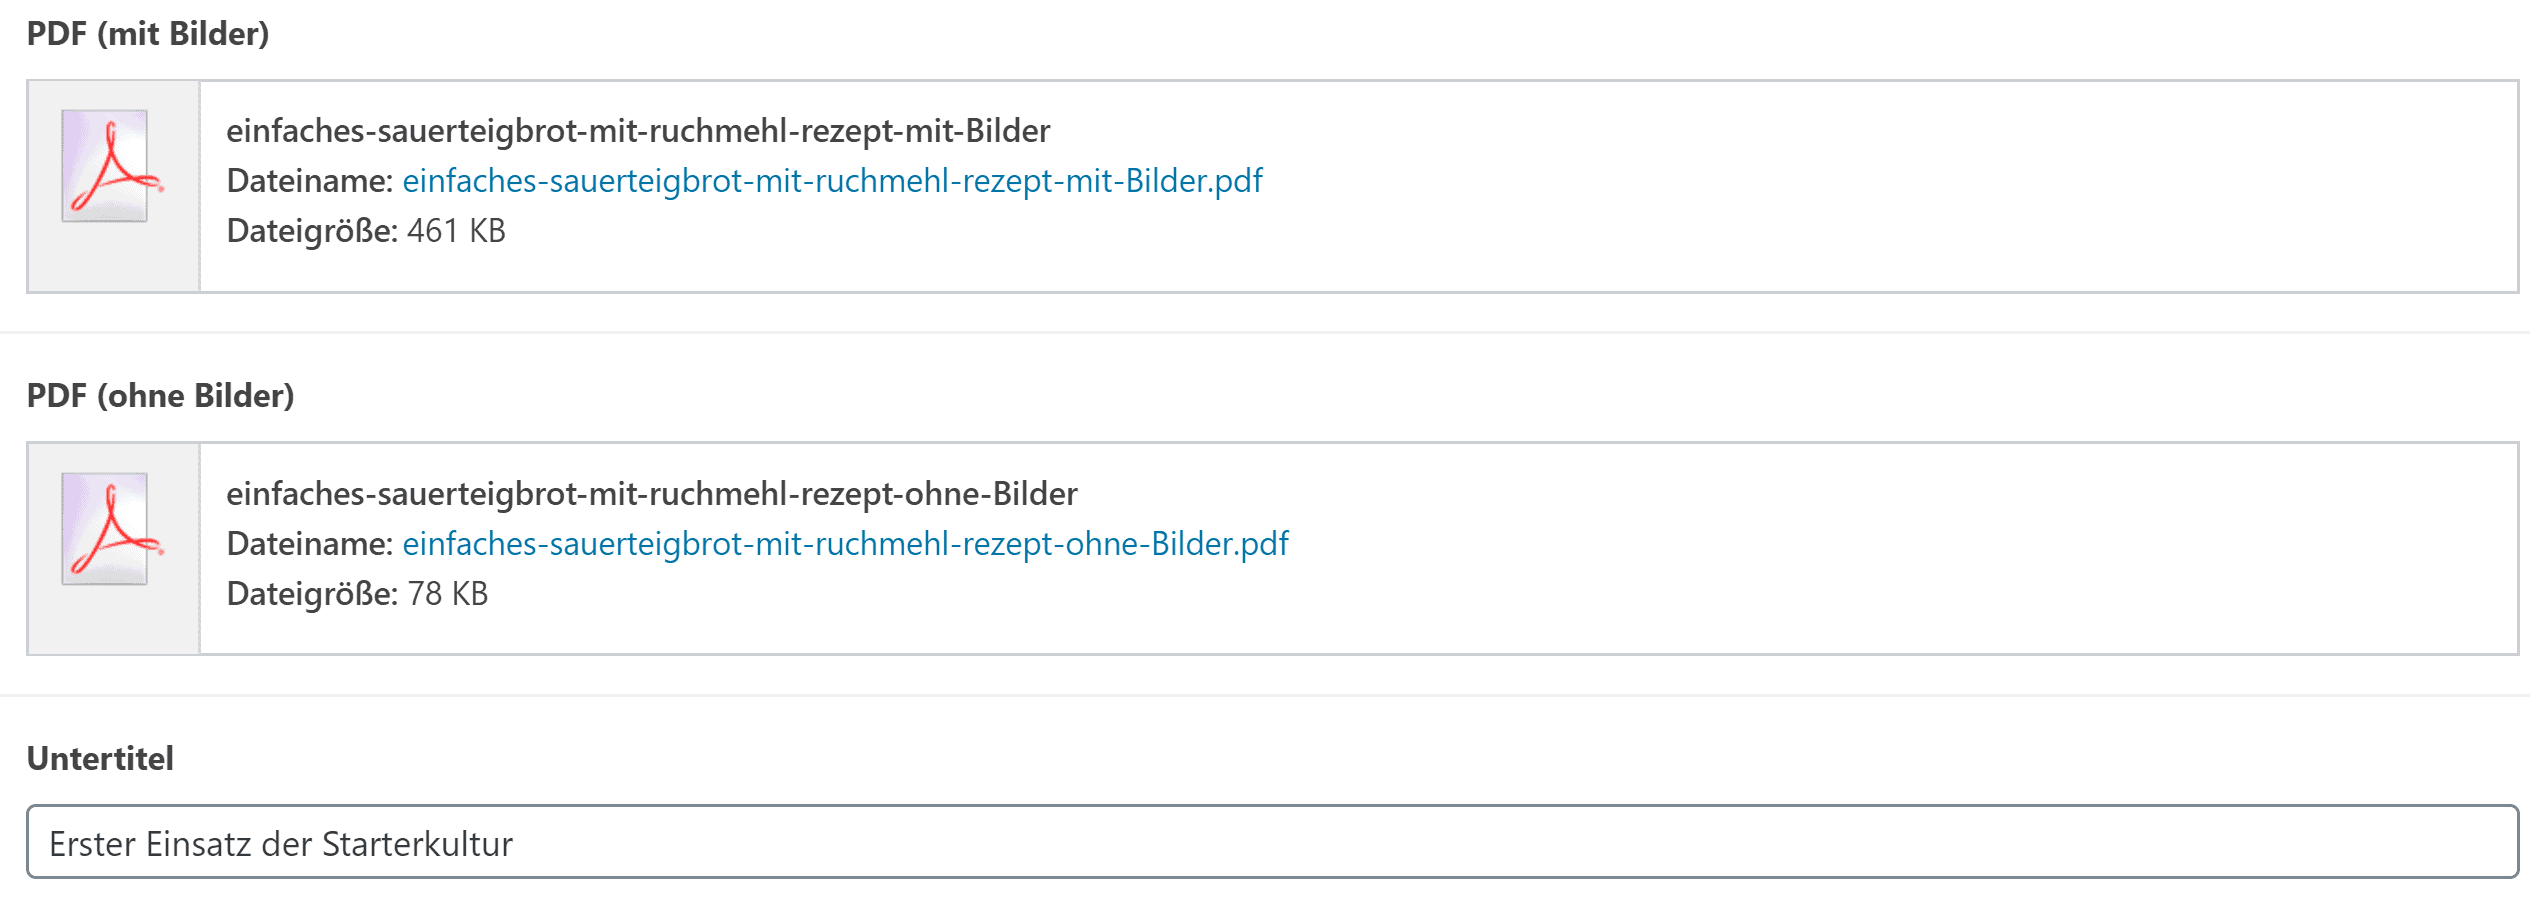
As you can see in the screenshot above, the custom fields will appear in a metabox underneath the WordPress editor whenever the category Food is selected. This will happen without having to refresh the page, it will immediately appear without you having to do anything.
GeneratePress page heroes and wasted space
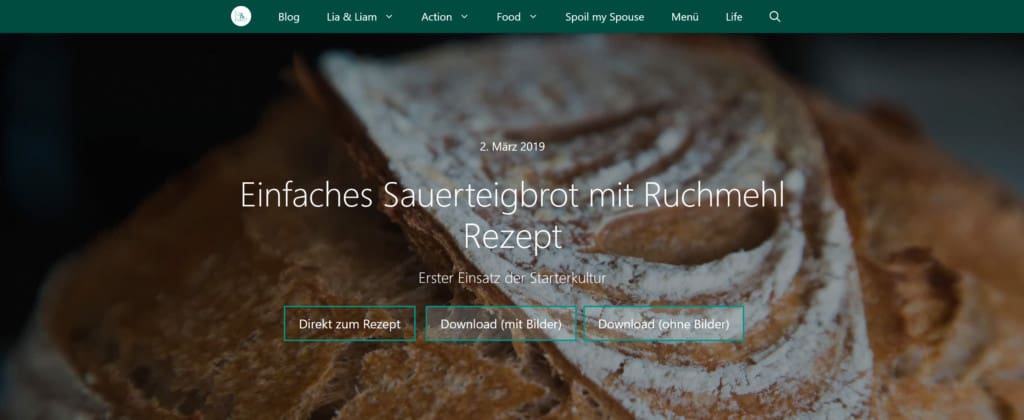
I consider displaying a page hero on your GeneratePress website without any relevant information, just because you can, wasted space. It’s just something the visitor has to scroll past to get to the actual information on your page. I came up with what I consider a genius solution to mitigate that problem. To liven up my page hero I’ve used the GeneratePress Elements to add in a few details:
- The recipe title is displayed in a large font.
- A wee subtitle is added underneath.
- One button takes a visitor directly to the recipe, skipping the intro altogether.
- Two buttons offer PDF downloads of the recipe, one with images, the other without any images.
Combining a GeneratePress page hero with custom fields
For the sake of simplicity, I made the setup for each new recipe a bit easier by using the custom fields set up earlier in combination with a GeneratePress Element. The subtitle and the PDF documents will be added as custom fields and displayed automatically in every page hero. My GeneratePress Element for the page hero looks like this:
<p>
{{post_date}}
</p>
<h1 class="hero">
{{post_title}}
</h1>
<h2 style="font-size:1.3em">
[acf field="untertitel"]
</h2>
<p>
<a class="button direkt-zum-rezept" href="#rezept">Direkt zum Rezept</a><a class="button download-rezept"
href='[acf field="pdf_mit_bilder"]'>Download (mit Bilder)</a><a class="button download-rezept"
href='[acf field="pdf_ohne_bilder"]'>Download (ohne Bilder)</a>
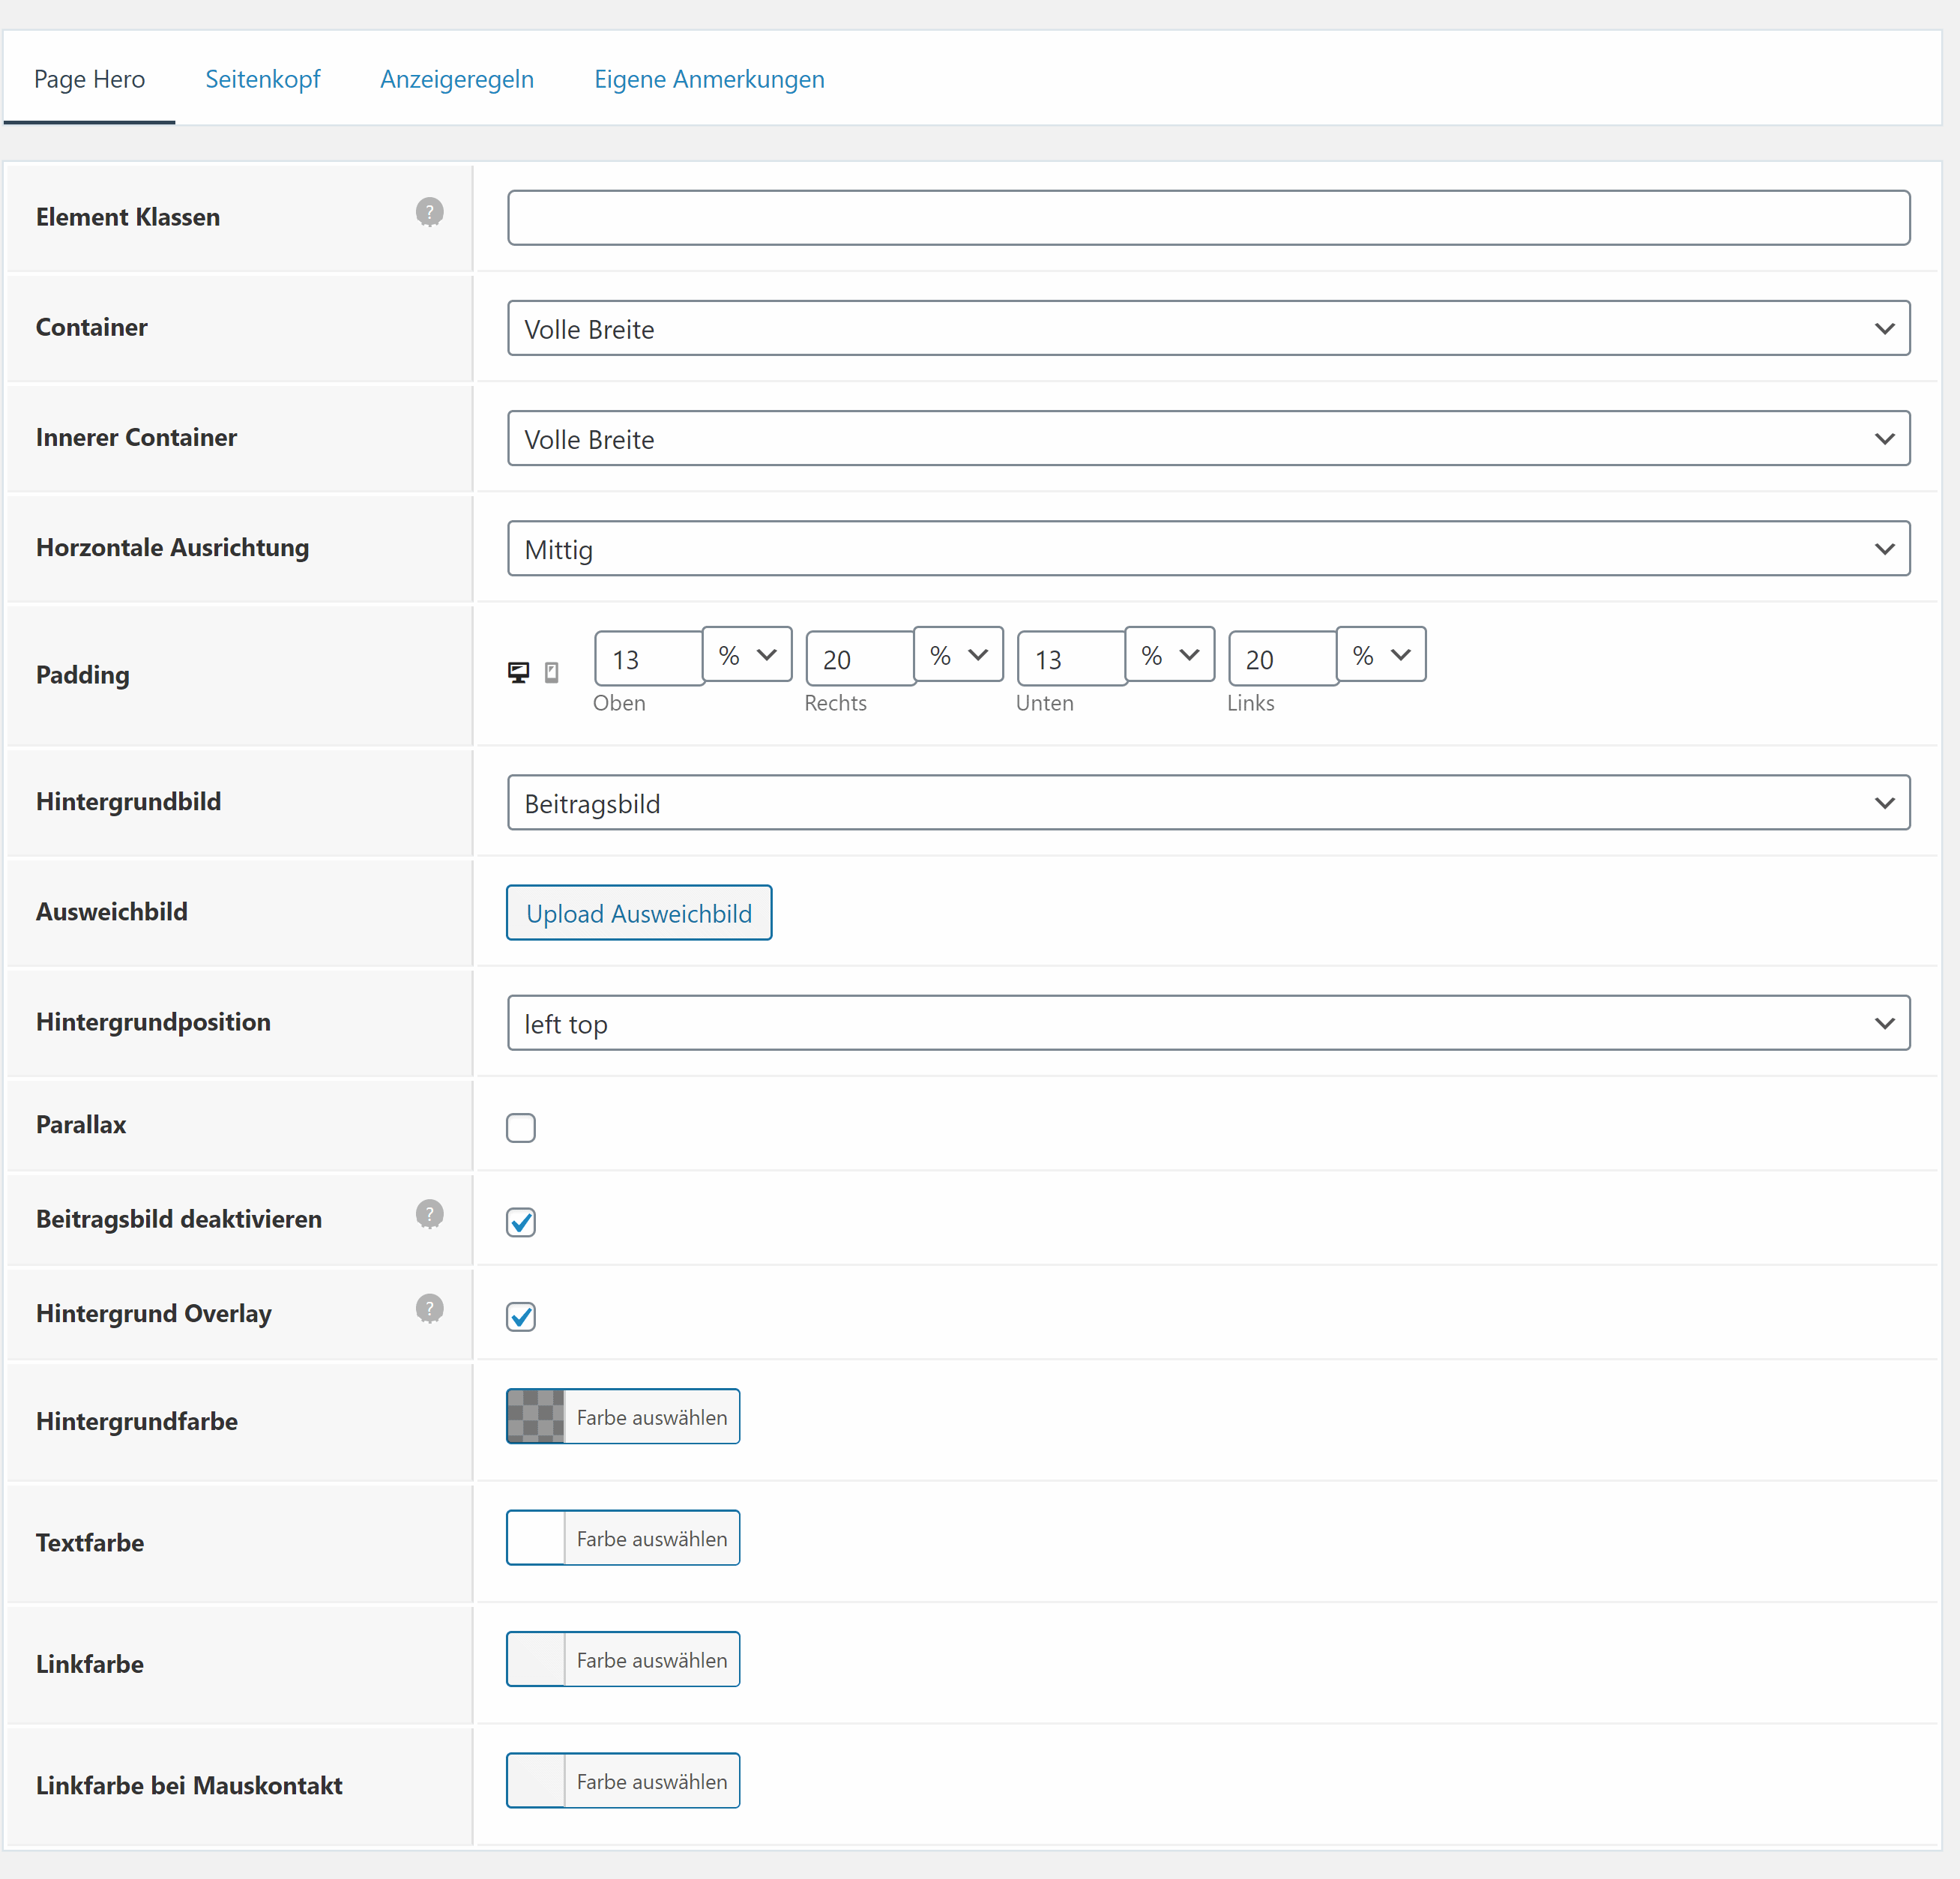
</p>To display the image itself, I use the following settings in my GeneratePress element. Make sure you set the background image to Featured Image (Beitragsbild) and add some padding to make the page hero larger or smaller.
Breaking down the page hero’s code
For you to get a better understanding of what I just did, I will break down the individual parts of the code and explain what everything does. This should help you build your own, personalised page hero on your GeneratePress website.
<p>
    {{post_date}}
</p>
This is a template tag built-in to GeneratPress. It will simply display the date as a simple paragraph with no special formatting.
<h1 class="hero">
    {{post_title}}
</h1>
This is once again a built-in template tag. This will simply display the post’s title as a Heading 1 with an added CSS class (code available further down).
<h2 style="font-size:1.3em">
    [acf field="untertitel"]
</h2>
This is the subtitle. The subtitle is a custom field created with ACF.
<p>
    <a class="button direkt-zum-rezept" href="#rezept">Direkt zum Rezept</a><a class="button download-rezept"
        href='[acf field="pdf_mit_bilder"]'>Download (mit Bilder)</a><a class="button download-rezept"
        href='[acf field="pdf_ohne_bilder"]'>Download (ohne Bilder)</a>
</p>
These are the three buttons. One of the buttons simply navigates to an anchor in the post. The other two (the PDF downloads) are also created using custom fields.
My page hero’s custom CSS
To make everything look good and match the rest of my website’s design, I added just a few lines of custom CSS.
Buttons
The buttons are designed to be ghost buttons. That means that they are slightly transparent and turn solid whenever the visitor hovers over them. This was achieved with the following CSS code:
.button.direkt-zum-rezept {
    background: transparent;
    color: #ffffff;
    border: 2px solid #009688;
    font-size: 1.1em;
    margin: 10px;
}

.button.direkt-zum-rezept:hover {
    background: #1de9b6;
    color: #000000;
    border: 2px solid #009688;
    font-size: 1.1em;
    margin: 10px;
}

.button.download-rezept {
    background: rgba(224, 242, 241, 0.2);
    color: #ffffff;
    border: 2px solid #009688;
    font-size: 1.1em;
    margin: 5px;
}

.button.download-rezept:hover {
    background: #1de9b6;
    color: #000000;
    border: 2px solid #009688;
    font-size: 1.1em;
    margin: 5px;
}
Page Hero Heading
Because I wanted the Heading in my Page Hero to be larger I added the following lines of CSS. I had to make this code responsive because the text was too large for mobile devices.
@media screen and (min-width: 768px) {
    h1.hero {
        font-size: 3em;
    }
}

@media screen and (max-width: 600px) {
    h1.hero {
        font-size: 2em;
    }
}
That’s how you create a page hero in GeneratePress
Just like that, the page hero is complete and will show up on every post you define in the GeneratePress Element’s display options. If anything, I hope this guide has shown you how to integrate custom fields into your own page heroes for future inspiration.